As Om Raj Tech Inc., a dedicated manufacturers’ representative, we take pride in connecting our partners with leading manufacturing solutions. Today, we’re spotlighting Jimdi Plastics, an industry expert in plastic injection molding, and their remarkable capabilities in advanced mold-in-color processes. In a market where product aesthetics and durability are as crucial as functionality, Jimdi Plastics consistently delivers components that meet exacting color standards and high-performance demands.
Mastering Color Directly from the Mold
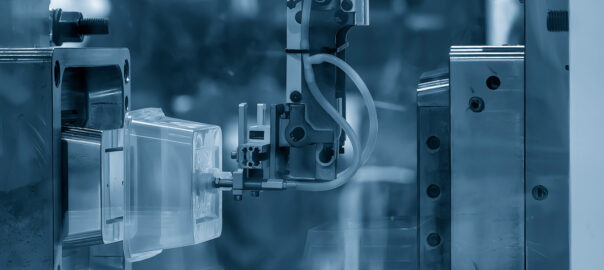
At Jimdi Plastics, “mold-in-color” means the plastic material is precisely colored before it’s injected into the mold. This integrated approach offers distinct advantages over post-molding painting:
- Enhanced Durability: The color is inherent to the material, making parts more resistant to chips, scratches, and fading.
- Consistent Aesthetics: Mold-in-color ensures uniform color across all parts, which is vital for brand consistency and overall product appearance.
- Streamlined Production: Eliminating secondary painting steps can contribute to a more efficient and potentially cost-effective manufacturing process.
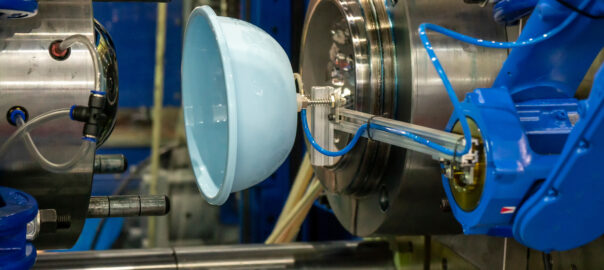
Jimdi Plastics demonstrates versatility in their color molding. They can work with pre-color material or utilize “salt and pepper” mixes to achieve the desired shade. To ensure precise color matching, whether it’s for a proprietary texture color or replicating an existing part, color card, or specific range, Jimdi collaborates with a network of trusted vendors.
Achieving Flawless Class A Surfaces and Mitigating Defects
A particular area of expertise for Jimdi Plastics is the production of Class A surfaces. These are often exterior components, such as a chair’s front cover, that are highly visible and require an impeccable finish. Jimdi’s commitment to quality ensures these textured surfaces are free from common defects that can plague colored plastics, including:
- Color Swirls: These can occur if the material isn’t mixed properly or if pellets don’t blend correctly.
- Burns: Overheating of the material can lead to visible burn marks, particularly noticeable with colors.
- Contamination: Any foreign particles can stand out on a colored surface, compromising the part’s appearance.
Jimdi’s team is skilled at identifying and addressing these issues, even resorting to remixing material or adjusting quantities to achieve a flawless result.
Rigorous Quality Assurance: Jimdi’s Commitment to Consistency
To uphold their high standards in color molding, Jimdi Plastics implements a comprehensive quality assurance protocol:
- Operator Color Acuity Training: All operators undergo specific training and testing to sharpen their ability to detect subtle color variations.
- First-Piece Verification: Before a production run commences, the quality team meticulously checks the first molded part against customer-provided color cards to confirm it falls within the specified color range.
- Continuous Color Checks: Throughout the entire production run, ongoing color checks are performed to maintain consistent part appearance and finish.
- Advanced Color Measurement Technology: Jimdi utilizes a specialized unit that measures the reflectiveness of the color with remarkable accuracy, up to 0.01%. This advanced tool allows them to:
- Rapidly verify colors in as little as three seconds.
- Set a master color and define a precise acceptable range, for example, achieving a 99.9% color match within a 99.7% acceptable range.
Beyond Color: Jimdi Plastics’ Comprehensive Capabilities
While Jimdi Plastics’ expertise in mold-in-color is a significant asset, it is part of a broader spectrum of advanced injection molding capabilities. Established in 1997, Jimdi Plastics operates from a 40,000 square-foot facility in Allendale, equipped with 16 presses ranging from 150 to 1100 tons. They excel in serving companies that do not produce plastic themselves, offering a “hands-off, out of mind” solution for their plastic needs.
Jimdi Plastics serves a diverse range of industries:
- Automotive: They have a deep-rooted history in the automotive sector, focusing on challenging parts, often using nylon and glass-filled nylon. Their processes are designed to meet the automotive industry’s “fastidious” PPAP requirements, submitting a Level 3 PPAP for all automotive projects.
- Office Furniture: A strong focus in West Michigan, supporting major furniture makers. They manage projects ranging from high-volume parts run weekly to tools run only once a year, utilizing materials like styrenes, polypros, ABS, clears, and opaques for both functional and aesthetic components.
- Consumer Products: Jimdi actively works to bring consumer product manufacturing back to the United States, leveraging their ability to compete on total value chain costs against overseas suppliers. They can even help create CAD from sample parts if original tooling information is unavailable.
- Guns and Ammo: A passionate area for the team, Jimdi produces components like wads for shotguns and works to integrate more plastic into firearm designs.
- Medical: Experience in molding large diagnostic equipment housings and capable of rapidly developing tooling for smaller diagnostic test kits, especially for companies looking to onshore production.
Their manufacturing versatility extends to a wide array of materials, including nylon, glass-filled nylon, PCABS, styrenes, polypros, ABS, clears, and opaques.
Jimdi Plastics also offers a comprehensive suite of secondary operations:
- Sonic welding
- Painting (through world-class partners)
- Kitting and hand assembly
- Hot plate welding (with in-house technical experience to bring this capability in)
- CNC machining of plastic parts (with in-house technical expertise)
- Laser etching (through partners)
- Examples include assembling arm pads onto powder-coated castings and multi-piece assemblies.
Automation is integral to Jimdi’s operations, enhancing efficiency, part accuracy, productivity, and operator safety:
- Central resin loading via vacuum systems ensures continuous material supply to presses.
- End-of-arm tooling for robots handles pick-and-place operations.
- Custom-designed subassemblies and check stations improve part quality and assembly processes for complex products like chair components.
- Automated programs for tools optimize cycle times and allow operators to focus more on quality control.
Jimdi’s commitment to quality is underscored by their rigorous PPAP process, which includes DFMEAs (Design Failure Mode and Effects Analysis), PFMEAs (Process Failure Mode and Effects Analysis), control plans, and dimensional studies, especially critical for automotive applications. They establish clear visual masters of “good” and “bad” parts to standardize quality expectations across their teams.
They also address common manufacturing challenges, for example:
- For large, thick-walled parts like hydraulic valves, they’ve developed processes to eliminate voids and achieve long cycle times (9 to 17 minutes).
- For glass-filled nylon automotive components, they’ve solved issues of dimensional instability, warpage, and ovality by introducing chillers to control the process and reduce shrink caused by hot runner systems.
- For thin-walled waste bins, they’ve mastered processes to prevent inconsistencies in wall thickness.
Jimdi Plastics works with various tooling solutions, including domestic, overseas, and a hybrid model where local tool shops partner with overseas manufacturers. They can also use mud-based tooling which allows a common frame for multiple tools, sharing costs. Furthermore, their program management team provides weekly updates and milestones during tool builds, often with pictures, to keep customers informed. For onshoring projects, Jimdi offers the unique value of having “boots on the ground” in China to physically inspect tools and bank numbers at supplier facilities, assisting customers with a smooth transition.
Jimdi’s philosophy on continuous improvement involves identifying five key projects annually and driving them to completion, ensuring ongoing value delivery to customers.
Connect with Om Raj Tech Inc.
Jimdi Plastics stands out not just for their technical prowess but for their deep understanding of various industries and their dedication to being a comprehensive solutions provider. If you’re seeking a manufacturing partner capable of delivering high-quality, consistently colored, and precisely molded plastic components, Om Raj Tech Inc. is here to help you explore Jimdi Plastics’ offerings.
For more information or to discuss your specific plastic injection molding requirements, we are available to connect.
Sumeet Chhawri SALES REP SUMEet@OMRAJTECH.COM 248 843 9478